|
FAQ section
|
Written by David Rivenburg, AD5OO
|
|
Tuesday, 23 February 2010 17:43 |
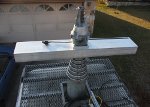
Antennas have 3 main operating features of interest. Gain, directivity, and polarization. Size also matters but usually isn't the biggest factor. Stock antennas for the AP or Router have very low gain and are omnidirectional. Polarization is variable depending on what direction the shaft is pointing. You can get double duty by adding gain in a forward direction while excluding signals to the side of or behind your antenna. This gets better still when you set the antenna up for horizontal polarization. Most existing WiFi signals are vertical. The industrial noise in the band is also more vertical than horizontal. Directivity is measured lots of ways but one of the most common is the 3dB beamwidth. Another is front to back or front to side gain ratios. With a 12-15 dBi flat panel, you will knock off almost everything behind you and most of what is to the side. However, anything within 30-40 degrees or so of the aim point is in the hot spot. Going up to 24dBi of gain takes the beamwidth and shrinks it to only a few degrees. This is a superior way to exclude other signals by not looking at them. The weak, distant signal you receive can still be used just fine if you make all of the others near the same frequency MUCH weaker. Both stations need to use the same polarization or the signals really dip in strength. Some possible antennas include:
This site lists some interesting home brew antenna measurement test equipment. Unfortunately, some of the articles are in Dutch. |
|
|
Useful applications for your computer |
 |
 |
 |
|
Written by David Rivenburg, AD5OO
|
|
Tuesday, 23 February 2010 17:29 |
Backtrack, formerly known as the Auditor Security Collection CD, is a bootable Linux CD (Live CD) that runs in RAM. You can boot this tool, use it and then reboot to your hard drive with no footprint or disruption at all. Tools here include Kismet and other great wireless tools. Tools are provided to test the external hardening of networks against attack. Ethereal is the best deal around. It's almost universally acclaimed as THE packet sniffer for nearly any OS. Formerly, special network cards and unique software were needed to do this task. Costs of $4000 to $8000 were paid by major corporate I/T departments to get fewer features than this package delivers for free. Kismet is an 802.11 layer2 wireless network detector, sniffer, and intrusion detection system. Kismet will work with any wireless card which supports raw monitoring (rfmon) mode, and can sniff 802.11b, 802.11a, and 802.11g traffic. When used with a GPS receiver, maps of detected wireless networks can be generated.
Network Stumbler, also known as NetStumbler, is an excellent tool if you run Windows and have a compatible card. It can make use of a GPS signal, writes log files and is easily used to measure or peak up signal strength on wireless networks. "War Driving" is the term used when you run NetStumbler or a similar tool while mobile. It is amazing the number of wireless systems already deployed and even more amazing at how many of those have the default channel, SSID and no WEP in use.
Inssider is another wireless scanning tool for Windows systems. It has additional graphing and some improved features from NetStumbler including waterfall displays, graphing per channel and more. It should be a core tool you carry.
s3d is a 3d network display server for Linux which can be used as 3d desktop environment.
SPLAT! provides site engineering data such as the great circle distances and bearings between sites, antenna elevation angles (uptilt), depression angles (downtilt), antenna height above mean sea level, antenna height above average terrain, bearings and distances to known obstructions based on U.S. Geological Survey and Space Shuttle Radar Topography Mission elevation data, path loss and field strength based on the Longley-Rice Irregular Terrain Model, and minimum antenna height requirements needed to establish line-of-sight communication paths and Fresnel Zone clearances absent of obstructions due to terrain. You can try out the online version here but you will have to work with existing sites in the database. Alternately, you can register, insert 2 or more of your own sites and then do your own path studies. |
|
Last Updated on Sunday, 17 October 2010 20:37 |
|
Written by David Rivenburg, AD5OO
|
|
Tuesday, 23 February 2010 17:25 |
|
The intent is to migrate the mesh from IPv4 to IPv6. Here's why:
1. It's coming. In fact, it's already here. Try to go to ipv6.google. com or ipv6.netflix. com with a v4 only system and it will not be able to. Presently v6 is optional, but after v4 runs out of addresses v6 will be in your life whether you want it or not. Also, I'd rather make my mistakes now when they are not so important than later when they actually matter.
2. The large address space. Presently the 10.0.0.0/8 address space on the mesh is not large enough to allow for both unique and automatically assigned IP addresses. If it was a managed space, the available addresses would certainly be enough for the foreseeable future. But that's the point. The space is not managed. Running a DHCP server on the mesh is out of the question, and manually assigning addresses would become both an administrative nightmare and an unnecessary burden on users. Configuring a mesh node consists of setting a hostname, and soon a domain name. That is about as simple as it gets. Everything else is handled by the node itself. I'd like to keep it that way.
Now, the large addresses are going to be a pain to work with, but that's ok. Ideally you should never need to know an address. That's what DNS is for. Do any of you know the IP address of google.com? Probably not, but we all know its name and that's what we use and (network problems aside) it always works. I'd say with great likelihood that none of you have ever needed to know the IP address for google.com. And so it should be on the mesh. With node names and tactical names it should be a simple matter to navigate the mesh.
3. The large network space. With the present 10.0.0.0/8 scheme it is not possible to break down the mesh into reasonable subnets without centralized management. Again, centralized management is the antithesis of how this mesh should work. The consequence of this is that every node on the system has to know explicitly how to get to every other node by means of a routing table entry. Just as the large address space allows for automatic node address assignment, the large network space would allow for automatic subnet assignment.
If a packet coming from Austin needed to reach a node in Plano, it wouldn't have to know the specific path it needs to take to get there. All it needs to know is that all packets destined for the Plano subnet can be sent to some specific nearby node and that node is able to route the packet to its destination. That's how routing is supposed to work. Can you imagine how hard the internet would be to use if you had to know not only which website you wanted to see, but also which routers you had to use to get there? Subnets are what make intelligent, autonomous routing possible without having to enumerate every possible destination.
4. Mobile IPv6. The IPv6 protocol itself supports mobile network clients whose entry point into the network frequently changes. In fact, it competes with OLSR on this point. The routing and neighbor discovery features in IPv6 could possibly make OLSR obsolete, but at least for now OLSR will likely be easier to work with. On the other hand, mobile clients will probably see improved performance and less stuttering with IPv6 as they move from one node to the next.
5. Multicast routing - sending a single packet to multiple destinations. After all, the MM in HSMM is MultiMedia, and MultiMedia is practically synonymous with audio and video. It is much less of a burden on the network and the stream provider when multicast is used. You can do multicast in IPv4, but it is not widely implemented. It is generally not available on the internet without setting up special tunnels to make it work. In IPv6 it is mandatory that routers support multicast and it has several improvements over the IPv4 implementation.
6. I have to. My formal training is in computer engineering, but my career has been diverted into IT for the past decade. Before long an IT person without practical IPv6 experience is going to be useless. Here I am, developing an advanced networking platform on the cusp of worldwide IPv6 deployment. It would be foolish of me to not take advantage of the benefits of IPv6.
73
ad5oo
P.S. Bear in mind that I am talking about the mesh, not the local networks behind the nodes. You can manage the local networks any way you like, but the mesh as much as possible needs to be autoconfiguring and require no setup or foreknowledge of the environment in which it is expected to work. |
|
|
Laptop wireless adapters and Internet access |
|
|
|
|
Written by David Rivenburg, AD5OO
|
|
Tuesday, 23 February 2010 17:14 |
|
Most of us will probably be using laptops with our mesh nodes, and most laptops are going to have a wireless adapter. In addition, when we are experimenting with our mesh nodes we are likely to be home and the temptation is to connect with your home access point for internet access. This is a mistake. Why? When your wireless is connected to your home access point and your ethernet is connected to a mesh node, your laptop is being given contradictory information about how it should handle its networking. Maybe it is smart enough to make everything work, but the chances are very good that it isn't. If not, you will not see the behavior you expect from either the mesh or your home network.
Instead, if you want to play mesh and at the same time have internet access, there are three ways to achieve this:
- connect your laptop to the LAN port of the node, and the WAN port of the node to your home network
- use two nodes with mesh access point mode
- connect the WAN port of node 1 to your home network
- set the mode of node 2 to Mesh Access Point
- connect the LAN ports of both nodes together
- connect your laptop by wireless to node 2
- use two nodes in dynamic default gateway mode
- connect your laptop the the LAN port of node 1
- connect the WAN port of node 2 to your home network
If you are using method 1 or 3 and want to ensure a disruption free mesh experience, disable your laptop wireless adapter to prevent it from connecting on its own. You are now counting on the mesh node to give you wireless network access.
If you use method 3, be sure that you restrict your internet access to that which is acceptable under Part 97 rules. All your internet traffic is now being sent over a Part 97 radio link. Alternatively, you can operate under Part 15 rules by using the stock antennas, removing any radio amplifiers, and removing your callsign from the node names. Using your callsign in association with radio transmissions of any sort implies that you are doing so under Part 97 rules. If you are not following Part 97 rules, you must not use your callsign.
|
|
Using an AirLink101 SkyIPCam250 |
|
|
|
|
Written by David Rivenburg, AD5OO
|
|
Tuesday, 23 February 2010 17:09 |
|
This IP camera does not properly work behind a port forwarding router when viewing video in java mode. The camera is not aware that port forwarding is going on so it does not include the necessary port number in the web pages that are generated which require java applets to be downloaded by the browser.
All is not lost though. The camera does allow setting up a secondary port. Connect a browser to the camera (refer the the camera's instructions) and do the following:
- click System Administration
- click Configuration
- click Network
While we are configuring the network, it is desirable to set a static IP address:
- click Fixed IP
- IP Address = 172.27.0.240
- Subnet Mask = 255.255.255.0
- Default Gateway = 172.27.0.1
Near the bottom of a page is a setting for a Second HTTP Port:
- click Enable
- Port Number = 8100
Now click Save and power cycle the camera.
On the Port Forwarding page of the mesh node, set up a forwarding rule with 8100 as both the outside and inside port, and set the IP Address to 172.27.0.240.
If multiple cameras are connected to a node, add one to the address and port number to keep them distinct.
To view the camera, connect a browser to http://your-node:8100
|
|
|
|
|
|
|
Page 3 of 6 |
|